Need some advice?

Showing posts with label Halloween. Show all posts

Wednesday, November 10, 2010

Look What Arrived Today!


A Sephora haul! Yay!!

Most of the time, I can't afford to buy too, too much at Sephora because the prices are a tad bit expensive, but every year the store does what they call their Friends and Family Sale where you can 20% your entire purchase.

That's right. 20%! That's a heck of a lot off their products, especially when you're already shopping the sales and bargain items.

I've always wanted one of Sephora's Beauty in a Box sets simply because I love kits since they give you a great variety of products that work well together and suggestions on how to use it. This year, Sephora created four Beauty in a Box sets that would make great Halloween looks: a Vegas Showgirl, a Peacock, a Vampire, and a Devil. While I thought the vampire and devil kits looked great (especially the devil one, which had a black lipgloss I've been dieing to try!), I opted to go with the Vegas Showgirl and Peacock kits because I felt I would get more use out of them.

Anywho, the day after Halloween, these sets went from $26 all the way down to $10! What a deal! So, naturally, when I couldn't decide between either of them, I grabbed up both. After all, each was valued at over $50 and that's a GREAT deal for higher-end cosmetics. Plus, with the Family and Friends discount, the boxes were only $8 a piece. SWEET!!!

So, today, my Sephora box arrived. I was so excited to open it! And Sephora never lets you down with presentation. Even though I didn't order gift wrap, the kits were wrapped in the iconic red tissue paper and displayed like the crown jewels. Inside each kit, the items themselves were also wrapped in the red tissue (which I conveniently ripped to shreds in my excited state. Hehe..). Needless to say, I was impressed to find that the kits had full sized products in them, and not the little 'deluxe samples'/one time use products I thought would be in there. Both look uber fun, so here are my first impressions.


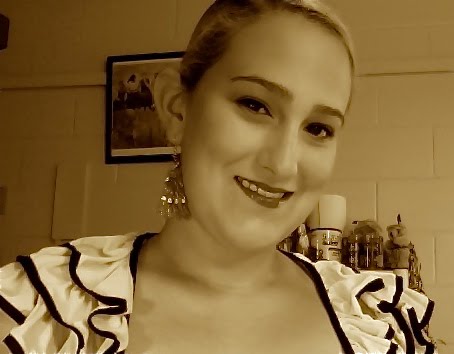
Vegas Showgirl: So far, I'm LOVING the lipgloss (it's the only thing I've really tried on). It's a gorgeous hot pink and full of glitter: totally glam. I find that it does stain your lips, which I'm a fan of since I hate reapplying makeup just shortly after i first apply it. The formula is smooth and silky -- not heavy at all -- and the doe-foot applicator feels more luxurious than most. Though I have not really used them yet, the shadows look gorgeous and are highly pigmented. The eyeliner is quite pretty, too, even though I just swatched it on my wrist. I have not sprayed the glitter yet, but I'm excited to! The only thing I wasn't an immediate fan of was the false lashes. Online, I couldn't tell that they had strands of glitter mixed into them. While I don't hate it, I think it kind of makes the lashes look tacky and I don't know if I'll really get to wear them very much. However, the over all kit looks fabu and I can't wait to really use the products!

Peacock: The lashes in this kit are to DIE for! So adorable!! I really love that you can apply as many or as little as you want to make the look yours. The eyeshadow combination is lovely... the dark green shadow is my favorite so far. These don't seem very pigmented, though, so I would recommend using a heavier hand with them. Again, the liner I swatched on my wrist looked beautiful, so that'll be exciting to use. The lipgloss -- although quite sheer -- smells deliciously sweet, so it should be pleasant to use. I also did not test the glitter spray in this kit.

Tomorrow, I should have at least one look tested, so I will let you know how it goes. The kits also come with little flaps in the front that provide instructions for a night look and day look for each kit.
Vegas Showgirl comes with a Colorful 9 Eyeshadow Palette in Forest Fantasy, Nano Eyeliner in Wild Spirit, Ultra Shine Lipgloss in Fuchsia, Silver Glitter Spray, and False Lashes. Above is the instruction flap!


The instructions on the Peacock kit tell you how to use the Colorful Eyeshadow Palette in Schizo, Super Shimmer Lipgloss Sugar Coat, Nano Eyeliner in Ladoon, Gold Glitter Spray, and False Eyelashes that come with it.

Monday, November 1, 2010

Happy (Belated) Halloween! My Makeup Look for Halloween

To celebrate Halloween (and kick off homecoming) this year, my boyfriend and I attended Ludacris's FREE concert at our university with thousands of other students. We had a blast getting into the school spirit, but because it was on Halloween, we decided to attend in our costumes. My lovely boyfriend and I were Musketeers. Here is my costume and makeup design with instructions for anyone who might want to recreate it for another holiday or costume party. Enjoy!

Eyes: For this look, I basically did the same eyeshadow I did for the Rocky Horror makeup tutorial, but instead of black shadow in the center, I used purple. This made the eye softer and more feminine, which complimented the flirty black dress. I lined both my upper and lower waterlines to make the eyes more sultry and then added a volumizing mascara. I didn't wing my eyeliner out, but you can to make the eyes more dramatic.

Face: Definitely do concealer after you do your eyeshadow because it'll keep fallout bits from collecting and making your undereyes look dark and heavy. I used a dark bronzer (again) to contour the face and a rosy blush to give my cheeks a natural flush.

Lips: I chose to do my lips in a pinky-berry color to make it look more flirty and natural. You could do a red lip for an evening look, but since the concert festivities started in the afternoon, I wanted my makeup to be appropriate for day time. Once again, I used the same techniques from the Rocky Horror tutorial.

Hair: I separated my bangs out and then French braided my hair to keep it nice with my hat on. After finishing the braid, I straightened my bangs and tucked them behind my ears, securing longer strands with a small bobby pin. Lots of hairspray was used to prevent fly-aways!!

Saturday, October 30, 2010

Happy Halloween! Tips for Drag Makeup

Makeup gurus everywhere have been doing makeup tutorials for Halloween looks for the last month, but I've really been unsure of what type of post I wanted to do for Halloween. After much thought and brainstorming, I decided to do a tips blog on one of my favorite costume-y looks: Drag Queens.

I have a deep respect for the amazing men who do drag, or female impersonation, for a living. Rupaul is a living legend and I think of her as a beauty icon like Marylin Monroe or Sophia Loren. Doing drag is NOT easy and requires a lot of time and patience, even if you're only doing it for one night (i.e. Halloween).

So, gentleman, whip out a pen and get ready to take notes. You've got a lot to learn...

1) Get the closest shave possible. You need to get rid of as much facial hair as possible. I would strongly recommend using a brand new razor and a rich, moisturizing shaving cream to make facial hair disappear. Razor burn is not cute, so make sure you do this very carefully! If you're feeling brave, you can always shave or wax your eyebrows as well (either completely off or make them thinner and more shapely). Reducing your eyebrows will make makeup application much easier later on.

2) Make sure your complexion is flawless. You need to cover any imperfections and have a very even-coverage foundation for your face. If you left your eyebrows intact, check out youtube for some direction on how to cover them up (I'd recommend Youtube Guru and professional makeup artist Kandeejohnson) and then redraw them on.

3) Do not, do not, DO NOT use regular drugstore makeup unless you are going for the manly-woman appearance. If you want to truly look like a woman for the night, you're going to need more dramatic makeup. I'd recommend NYX as an affordable alternative, but more expensive brands like MAC, Obsessive Compulsive Cosmetics (OCC), Urban Decay, and Nars are also good choices.

4) Do NOT have a girl help you with makeup unless she's A) a makeup artist or B) has experience with dramatic, theatrical makeup. A lot of girls and women know how to do natural makeup. That's not what you want. You're going to want heavier makeup with a glitzy, highly pigmented look. Yes, it's going to look a bit streaky! But drag means magnifying every aspect of a woman's appearance and drawing it on a man. It's meant to look a bit outrageous.

5) Think about how lighting hits a woman's face. I'd recommend looking at pictures of Beyonce, Angelina Jolie, or Megan Fox to figure out how to add highlighting. Take a blush brush with a light-colored shimmery powder or cream and lightly dust it onto upper cheek bones, down the nose, and center of the chin. This is going to make your face look dewy and young.

6) Learn how to apply and wear fake lashes. Once again, check Youtube videos by guru JuicyStar07 for fantastic directions and recommendations on false lash brands. False lashes will also make you look more feminine and soft.

7) Contour the face! Get a matte bronzer and sculpt your face by adding simple lines to the face that emphasize high cheek bones and slim your face down.

8) Pay super-close attention to your lips! I would recommend lining your lips with a color two to three shades darker than the lipstick you plan to use. Line just outside your natural lip line to make your lips fuller and plumper looking. Try to draw the line as smoothly as possible, but don't panic if your hand slips or you mess up.. you can always take a q-tip with some makeup remover on it and swipe it over the boo-boo. Pay close attention to your cupid's bow, or the indentation at the peak of your top lip. You want this to highlighted, but don't make it too pointy. After you line your lips, gently apply lipstick and stay INSIDE the lines you just drew. Then, blot your lips and reapply again. This will keep your lipstick in place for longer and look neater. Lastly, add a small amount of gloss to your bottom lip (it can be colorless or match the shade of your lips, glossy or shimmery. Your choice!) and you're good to go.

Of course, this is just an abbreviated list of what you really need to do for drag makeup. Drag queens spend several hours getting ready and look absolutely fabulous when they're done. This post was just a quick list of things that often get overlooked by amateur queens and can easily be fixed.

Thursday, October 28, 2010

Review: Pure Ice Nail Polish

For the past few months, I've really been trying to break my habit of biting my nails because it's not sanitary, not pretty, and not healthy (duh!). I've found that the best way for me to break this habit is by constantly painting my nails and making sure they always look pretty and polished. So, to make a long story short, I've been stocking up on tons of nail polishes so I can switch up my nails as much as I want.

Last week, I found Pure Ice Nail Polishes at my local Walmart. These little babies are only $2.00 a bottle and are so far pretty impressive. They come in a wide variety of colors (my store carried about 40 different shades, finishes, and colors of Pure Ice), but I chose to get some more Halloween/Fall inspired shades that could potentially work for other times in the year.
From L to R: Electric!, Wild Thing, and Naughty Girl
The first polish I tried from the line was Wild Thing, a fabulous lime green polish. It has a regular finish, which means it's just glossy. I think it's fun and different and would work excellently for anyone going as a zombie for Halloween. However, I also think it would look sweet and tropical in the summer time.

Then, I moved onto Naughty Girl, which is a metallic tangerine color. I really loved this one because it looks somewhat neutral on the nail but definitely makes people do a double take. Because it's orange, it's definitely appropriate for fall, but I think it could really be worn at any time since it's so neutral.

Currently, I have Electric! on my nails. This solid black polish has tiny flecks of silver glitter in it which add some dimension to the nail and keep it from looking flat like many black polishes do. I definitely find it appropriate for Halloween (which is on Sunday. Get excited!), but I think you could also wear it for New Years Eve because of the crazy silver glitter in it.

A quick shot of all three polishes so you can see what they look like on the nail!

I've found that this polish lasts a pretty long time without chipping (about 4-5 days) and only requires two coats. However, drying time is a bit long for me: about 4-5 minutes. Still, for the color payoff and low price, I think Pure Ice Nail Polish is worth it. Check it out the next time you're in Walmart!