Need some advice?

Showing posts with label neutral. Show all posts

Monday, February 7, 2011

Masterclass Mondays: The "Everyday Gorgeous" look for Olive Tones

Whoot! Welcome to Masterclass Mondays, a new weekly series that will feature a look from Jemma Kidd's Makeup Masterclass book. Today, I tried out her everyday look that features colors that specifically flatter olive skin tones. Fret not if you aren't olive, though! I will do more of her looks each week!

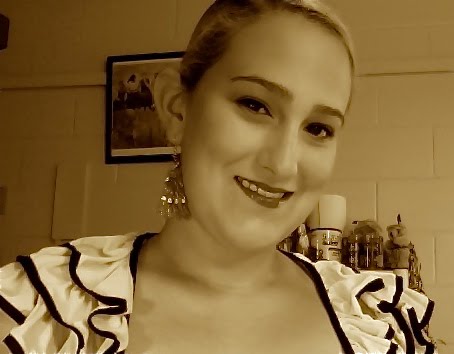
According to Kidd, every day looks should be neutral and not highly noticeable. The more natural they look, the better. Therefore, this particular look involves almost-skin tone shadows and colors.
I apologize for the poor photo quality. For some reason, these pictures came out super blurry =/

Eyes: As per Kidd's instructions, I left my brows natural and applied a gold-beige shadow (UD's Naked from the Naked palette) all over the lids. This shadow is slightly darker than my natural skin color. To "intensify the color at the socket and outer corner of the eye", I applied a cocoa-brown color (Buck from the Naked Palette) and blended it up into the crease. Lastly, I curled my lashes and applied a black mascara.

Face: I applied a liquid concealer on my under-eye circles and around the corners of my nose which tend to get red. Then, I applied a light-weight liquid moisturizer and a little translucent powder from Clinique to blot up any excess shine. To add a little bit of color to my face, I lightly applied a peach-toned blush that wouldn't look too made-up.

Lips: I used a rose-toned SPF infused moisturizing lipstick (Kidd recommends a rose tinted lip balm, but I didn't have any) to round out the look.

My opinion: I think this is a great look for everyday usage, especially for high schoolers who are just starting to dabble in makeup or women who like to stick with a naturally beautiful look. I did add a brown eyeliner once I was done because I felt that my eyes sunk into my face otherwise, but overall it's definitely a look I could wear every day. Plus, to make it even more appealing, it only took me 7 minutes to do! How awesome is that?!

Monday, November 15, 2010

Get the Look: Day-time Red Lips

When I think of classic, iconic makeup that NEVER goes out of style, I always think of the red lip. It's the epitome of sexy, feminine, strong, bold, and timeless all in one cute bundle. Many believe, though, that you can only rock a red lip at night or for a formal event because it's too sexy or too bold. But why should we as women think that way? I mean, shouldn't we embrace our femininity at all times?

Of course we should! Which is why you need not hide your red lipstick during the day, but rather learn how to wear it differently for a more office, school, or every-day appropriate look.
The trick, you see, is to use a coral lipstick instead of a true red. Coral, which was a huge hit this summer with blue eyeliner, is slightly more orange than red and therefore looks more neutral when worn. It's not just a summer trend, though! Because it has orange tones in it, I would argue it's very appropriate for fall and should be worn.

To keep your look more day-time appropriate and to draw as much attention to your red lips as possible. Keep the eyes mega neutral. For this look, I used a champagne shadow that had no shimmer or glitter in it all over the lid and no contour color. I did line my eyes and draw more attention to my ironic twist on the red lip, I added a small wing at the end, reminiscent of the 1950s pinups and starlets that made red lips popular.

The most important step of the whole process is to make any other colors on your face virtually disappear. You need to cover up any bags under your eyes, redness from acne, or general discoloration so that the most attention can be brought to your coral lips. I would recommend contouring your face, though, with a matte bronzer so that your face doesn't look flat and cartoony. You can also go in and add a highlighter if you have very dry skin.

Friday, November 12, 2010

Get the Look: Hot Pink Lips

For the most part, I tend to rock a neutral look during the day. Recently, however, I've been a fan of neutral eyes with a bright lip. In order to attain this look, you'll need a peachy or champagne-colored eyeshadow, tight lined eyes, and a really bright, highly pigmented lipstick.

As you saw a few days ago, I recently acquired a Fuchsia glitter gloss from Sephora, and honestly, I'm in love with it. Hot pink lips look flawless on all skin tones because they are not a commonly occurring color that looks feminine and flirty on everyone. This look was inspired by the gloss and centered around it!

Eyes: For this look, I wanted all of the attention to focus on my lips, so I did a very neutral -- almost naked -- eye. I used two shimmery neutral shades: one in peach and one in champagne.
I used the champagne tone in the bottom left corner and the peach tone in the center of the palette.

Apply the champagne all over the lid and the peach to the very center. Next, tight line your upper lid with black liner. You can then leave the bottom lid alone, tight line it in black, or tight line it in a bright purple to make the whites of your eyes pop.

Lips: Apply a hot pink or "Barbie" pink lipstick to your lips, taking care to highlight the cupids bow.
Blot your lips to remove any glossiness or metallic tones from the lipstick itself. Once your lips are sufficiently matte, apply your hot pink, glitzy lipgloss.
By applying the lipgloss on top of mattified lipstick, your gloss is going to stay on longer and your lip color will last much better.

And there you have it: a gorgeous bold lip look that takes less than 5 minutes to accomplish. Enjoy!